v2.23 kess v2 fw 7.020 ECU programmer

Tuesday 23 December 2014

Xtruck USB Link 125032 Bluetooth Connection

Xtruck combines the characteristic of previous Xtruck USB link and Nexiq 125032 USB link.  Xtruck USB Link 125032 adds advanced Bluetooth wireless function.

Computer Configuration:
Xtruck 125032 Driver: Microsoft Windows 2000 and XP operating systems
Xtruck Software: Windows xp and windows 7 32-bit and 64-bit and windows CE compliant
(Volvo, Hino, Perkins, Cat, and Nissan software must be installed in XP system. Other software can be used in Win7 32bit system.)

Xtruck USB LINK diesel software list:
- Allison
- Bendix 6.3.8.0
- Detroit Diesel DDDL 7.05
- Detroit Diesel DDCT
- Detroit Diesel Calibration Tool
- Eaton Service Ranger 3.2
- International DLB
- International ICAP, IPTS, NETS, IPC
- International Master Diagnostic
- Meritor and Wabco Diagnostics
- Cummins Insite 7.5
- Hino 2.0.3.
- Caterpillar 2.0.1.0
- Perkins EST 2010B
- V Macks 2.6.12
- V Macks Dealer Pro
- Volvo VCADS 2.35.10
- Toyota Techstream for car
Xtruck software supported language
xtrcuk usb link 125032
No cable is needed for vehicle diagnostic using the Xtruck USB Link 125032. The diagnostic base system can access the Xtruck USB link via Bluetooth or USB.

Access via Bluetooth:
After a connection to vehicle, the Xtruck USB link has been set up. The Bluetooth software provides a virtual serial COM port (Bluetooth Serial Port Profile). The Diagnostic Base System uses this COM port to communicate with the Xtruck USB link. After built connection with Bluetooth, the system will ask for a PIN “NEXIQ” (with all letters capitalized) to confirm Bluetooth communication. You need to specify this port when you install the diagnostic application.

Access via USB:
You can also connect the Xtruck USB link to the application PC by using the supplied USB cable. Windows detects the Xtruck USB link through Plug and Play, and automatically installs the drivers copied when you installed the diagnostic application. Setup of the Xtruck USB link is then complete and the device is ready for use by the diagnostic application.


Tuesday 16 December 2014

GM Tech2 bleed ABS brake systems procedures

Almost all modern vehicles have ABS system or anti-lock brake system on their cars and trucks. ABS brakes, like any other brakes which need regular maintenance including bleeding. Different vehicle models enjoys similar way of bleeding ABS systems are similar among different vehicles, but GM Tech2 scanner is specially designed for GM vehicle models.
GM Tech2 GM Diagnostic Scanner
The text below gives an instruction on how to bleed the ABS system with GM Tech 2 scan tool.
Tool:
GM Tech 2 scan tool

Follow the following instructions:
1) Raise your car into a properly support position
2) Disassemble all 4 tires and wheel assemblies
3) Check the brake system for leaks and visual damage. If the situation is damage or have to be get it done and how to use the device to make a possible position. Replace or repair as needed.
4) Check the battery state of charge (you may refer here)
5) Install GM Tech2 scan tool software. (Download related PDF manual on OBD365 webpage)
6) Turn the ignition to ON position with the engine OFF
7) Connect the GM Tech2 scanner into the OBD diagnostic socket
8) Select "Special Functions">> "Automated Bleed"
9) Bleed the base brake system.
10) Follow the Tech2 scanner screen instructions until the desired brake pedal height is achieved.

NOTE:
If the bleed procedure fails, do as following:
If a DTC is detected, select "Diagnostic Trouble Code" to clear DTCs. If the brake pedal eels spongy, repeat the conventional brake bleed procedure again.
11) When the desired brake pedal height is achieved, press the brake pedal to check the firmness.
12) Unplug the GM Tech2 scanner from the OBD socket
13) Install the 4 tires and wheel assemblies
14) Check the brake fluid level and the firmness of pedal again


Wednesday 10 December 2014

How to use MB Star C3, C4, SD C4 to do online SCN coding

If it is possible to do program injectors and gear resetting with his MB SD C4 diagnostic tool for the following cars:

E 320 cdi year 2006 W211 224 Ps v6
C 220 cdi Year 1999 w202 125 Ps
C 220 cdi Year 1998 s202 125 Ps

The answer is yes, but it requires the MB Star tool to open SCN coding function. As you can see, there is a “tips” option in SD C4 software, which usually is not available. You can also find this function in MB Star C3 and MB Star C4 software interface. This is the SCN programming function. It can be used only after you purchase account and password for the function. Here are steps on buying and using this function.

How to get SCN coding function:

1. Purchase online SCN coding service.
2. Provide your order number of the SCN coding service to UOBD2.NET customer service to activate this function.

How to use SCN coding function:

1. Prepare MB Star SD C4, a laptop, Teamviewer and the cars that you are going to do coding or resetting.
2. Select car model and system that you want to program, such as headlight XALWA-L.
3. Select CONTROL unit adaptations.
 MB Star use SCN coding function
4. Select offline program (CONTROL MODULE PROGRAMMING) then (SCN coding).
 MB Star use SCN coding function
5. Run teamviewer and enter teamviewer id and password.
6. Login server (DALMLER)
7. Login server and finish SCN coding.
http://www.mbstartool.com

Wednesday 3 December 2014

Super iCOM software for BMW ICOM/ICOM A2

Obd365 has newly launched the Super ICOM  ISPI NEXT 2014-12 Version software for BMW ICOM/ICOM A2 supporting update online and fitting laptops/pc in the market with SATS port. The Super ICOM is one of the best after-market tools for BMW diagnostic, coding, programming released by Super ICOM Industry Company.
The advanced V2014-12 Super ICOM ISPI NEXT enjoys following features:
1) Latest V2014.12 information:
ISTA-D: 3.46.20.1283
ISTA-P: 3.54.1.001
VIN: 2014.12
Software including:
Super iCOM Updater v1.0
Super iCOM SN Reader v1.0
Super iCOM Tray
iToolRadar
BMW VIN to HEX
VIN to HEX Decoder/Encoder
EWS Editor v3.2.0
Ncs Dummy 5.0.5
Ncs Dummy 6.0.1
INPA
NCS Expert Tool
WinKFP
E-Sys
Ediabas Configuration Tool
Ediabas Toolset 32
CCleaner
Teamviewer
Super ICOM 2014-12 Version Software
2) Super iCOM software is 100% fully functions as the dealer workshop use, including BMW Group ISTA, BMW Group ISTA-P, BMW Group ISPI Local path, Super iCOM updater v1.0, Super iCOM SN Reader, iToolRadar, etc.
3) Super iCOM software platform use ISPI NEXT which is the latest platform developed by BMW AG.
Super ICOM 2014-12 Version Software
4) Software support update online, one year for free. You can use update tool update software on www.supericom.com
5) Super ICOM software support multi-languages (with full repair article and Wiring diagram):
ISTA D: French, German, Greek, Italian, Japanese, Korean, Portuguese, Russian, Spanish, Swedish, Thai and Turkish
ISTA-P: German, British English, Czech , Thai, Korean American English, Swedish ,Spanish ,Italian ,French ,Greek ,Japanese , ,Indonesian ,Chinese ,Taiwanese ,Turkish ,Dutch ,Portuguese, Russian, and Polish
5) Super ICOM software improves and develops many new features comparing previous ICOM software.
Upgrade the ISTA-D Software till the latest version 3.46.20.1283
Upgrade the ISTA-D Software till the latest version 3.54.1.001
Rebuild the ISTA-P Launcher to V3.0
Fix the bug of full screen when using ISTA-P
Fix the bug of full screen when using ISTA-D
Fix the ISTA-P Launcher quit error
Fix the dealer information is ISTA-P/ ISTA/D
Add full languages selection options internal ISTA-P
Add brands selection options internal ISTA-P
Add the ISTA-P Launcher start waiting screen
Add the ISTA-P Launcher close waiting screen
Add the Campagna Motors in ISTA-D
Add BMW / BMW Motorcycle / BMW i / BMW Mini / Rolls-Royce / BMW UX selection options internal ISTA-P
Optimize the ISTA-D / ISTA/P starting speed
Optimize the Windows 8.1 first time start configuration speed
Optimize the Windows 8.1 Touch screen / Tablet drivers
Optimize Expert Mode coding / programming speed
Super ICOM 2014-12 Version Software
NOTE:
Software is preinstalled. Software comes with USB Key, no need active, one button click operation, very easy for use.

Tuesday 25 November 2014

Find 2014 VS450 VAG CAN OBD2 Scan Tool

The superScan VS450 SCAN TOOL is an OEM level diagnostic scan tool for most VW/Audis sold worldwide since 1990. This scan tool not only is accurate, reliable and easy to use, but it is also a time saver as well as a money maker.
VS450 VAG CAN OBD2 OBDII Scanner
Top 5 Reasons to Get VS450 obd2 scanner:

1. System upgradeable via the internet

2. Highly reliable and accurate

3. Easy to use with friendly interface

4. Large, easy-to-read backlit LCD

5. Safely communicates with the on-board computers

VS450 VAG Function and Feature:

Work with Volkswagen and Audi (Audi/Seat/Skoda/Jetta/Golf/Beetle/Touareg/GTI/Passat and more) sold worldwide since 1990
Read and clear generic trouble codes of cars using ISO 9141-2 (CARB),ISO 14230 (KWP-2000) and ISO-15765 (CAN) protocols
Read and erase Diagnostic Trouble Codes (DTCs) of Engine, ABS, Airbag, Transmission, Radio, Climate control(A/C), Cent., Elect., Steering wheel, Instruments, Immobilizer, etc. (18 Systems)
Turn off MILs of engine, airbag, ABS , A/T and most other systems
CAN (Controller Area Network) capability
Retrieve vehicle information (VIN)
Reset oil service light
Display I/M Readiness Status
Display DTC definitions on unit screen
Stand-alone unit with no need for an additional laptop computer to operate
One-year warranty against defects

http://www.mbstartool.com

Thursday 13 November 2014

NSPC001 automatic Pin code Reader for Nissan

Nissan Pin Code Function/Location:

With many radios in Nissan cars, codes are used to program and utilize the stereo system's features. For example, if you disconnect the main harness to fix pins and you need the calculated 4-pin code to relearn the immo.

These radios are installed at the dealership in most Nissan cars and the code can be entered from your driver's seat with no professional equipment or prior experience. Setting codes can be done as often as necessary and allows you to control your device.

Of course, you can turn to your Nissan dealer/manufacture or local mechanic to provide the PIN Code. But you can not sure they will immediately give you quick response. Sometimes you have to pay a little price for that. And thousand of people search the Internet everyday for free pin code. Many clues on wikihows are way too complicated for none-Nissan technicians.

Here is the easiest way to get Nissan PIN Code is handling with a NSPC001 Nissan Pin Code Calculator. No need software, no need computer. It is extremely easy to use, just plug and play, and operate according to the menu transfer.
NSPC001 pin code reader
NSPC001 is able to transfer Nissan 5-digit codes, 4-digit codes, and the newest 20-digit codes. Other older calculator can not work on 20 digit codes. It comes with 100 point built-in tokens. No tokens deduction when calculate 5-digit code to 4-digit code. 1 point will be deducted for each success transfer of new 20-digit code to 20-digit code and successful reading of BCM code.

NOTE:

When 100 tokens used up, you can still use it to get 4-digit code. But you need buy a new one if you want read new 20-digit pin code.
http://www.mbstartool.com

Friday 31 October 2014

Find Multidiag access J2534 Comparison Table

Share from OBDexpress Official Blog: http://blog.obdexpress.co.uk
Multidiag access J2534 Comparison Table
Note: the newer the Multidiag actia version is, the more car models it supports, and newer it can work with. As for what ECU type Multidiag actia support, it depends on specific car models and year, after finish installation, you will see the detailed car models, years and ECU types in the Multi-Diag software.

Take Multi-Diag Access J2534 V2013.2 for example, it supports more car models and newer cars shown as follows.
Multi-Diag Access V2013.2 supported car list
Multi-diag access j2534 function
Multi-Diag Access V2013.2 function
Multi-Diag Access V2013.2 supported Volkswagen ECU type
Multi-Diag Access V2013.2 delete fault code

http://www.obdexpress.co.uk/wholesale/2013-ii-multi-dig-access-j2534-pass-thru-obd2-device.html

Monday 20 October 2014

Best Diagnositc Tool Launch X431 V(X431 Pro)

Launch X431 V with Bluetooth/Wifi based on Android system, is a new car malfunction diagnostic device developed by Launch Tech for internet application.
X-431 V completely substitutes X431 IV and X431 Diagun III. It passes on Launch advantages in car fault diagnostic technology, such as vast car model coverage, powerful test function, special function and accurate tast data, etc.
Launch x431 V display
Find 7 reasons to get X431 V:

1. New operation interface design , more friendly interface and much easier operation

2. Supports wifi/Bluetooth, one click update, allows you to update software any time and any where freely.

3. Supports 72 car brands about 220 car models from European, USA and Asian.

4. Full diagnose function and fast running speed,Android System

5. Multi-language: English/ Spanish/ French/ German/ Portuguese/ Italian/ Japanese/ Polish/ Russian

6. Better replace X431 IV, X431 Diagun 3 and X431 PRO, available for some 12V diesel cars.

7. Easy to Update: Online update, Support Online one-click update, no need to update the software to CF Card.

Note:
1. Dealer Code: 86A
2. There is the Manual in the Multiplexer, you can check it when you use the device. it is in " cnlaunch" file.
Launch X431 V connection
OBD2 Tool

Thursday 16 October 2014

How to do airbag warning light on after dismantling steering wheel

Boxster 986 airbag warning light on after dismantling steering wheel
"I disassembled my Boxster 986 steering wheel to be able to deep clean, I disassembly and voila no problem, cleaning in the rules and easy reassembly (except for 1 of the 2 screws of the airbag).
By cons I have the airbag warning light that stays on. Guessed I may have forgotten a cable (I took pictures by dismantling to be on ...).  And torque for the center nut is just to get back on my brand."

An experienced technician help find out problem
"Flashing your back? You could check the bar back? For the airbag, if you have removed with the battery connected, it automatically creates an airbag error even if everything is well put together ... We'll have a shot to clear in PIWIS Then ... "

Then, I checked it was the airbag cable was not connected properly. Now that I've started like that, he will actually have to a little bit of PIWI but the Box is maintenance in two weeks. I will ask them to reset the all-). Return to the bar, it must actually be it. I have not completely removed the module from the stalk by fear of not knowing up but it really is a lesser evil.

Porsche PIWIS Cable $27 advise
The occasion you should you order a Chinese cable $27, it works very well for airbag fault. I already almost and I reserve for emergencies ...
http://www.obdexpress.co.uk/wholesale/new-porsche-piwis-cable.html

Monday 13 October 2014

How to reset ABS light with MB SD C4

I hooked my MB SD C4 to reset the ABS light of my 2007 MB S550s running 72,744 miles yesterday. This was my first time reset ABS light by using C4. I am likely to offer some instructions on it.
mb-sd-connect-compact-4-star-diagnosis-a
Instructions:

Step 1 Drove my vehicle onto my garage (better be a flat surface). Shift the “Park” of the transmission to turn off the engine. Turn on the ignition on to provide power on the dashboard.

Step2 Find out the vehicle’s OBD2 diagnostic socket located underneath the dashboard.

Step 3 Connect the Compact 4 diagnostic tool onto 16 pin socket via OBD2 cable. Connect the C4 with Dell 630 running Windows XP operating system via USB cable. Turn on the ignition of C4.

Step 4 Select the respectively function on the menu screen. MB Star C4 will detect the error code stored in the ABS computer module and then reset the fault code.

Step 5 Turn the device off, unplug it from the OBD2 socket. Go off the vehicle and check the ABS light is off and test it by driving a few minutes.

MB SD Connect Compact C4 is truly a best helper for Benz vehicles, with C4 automotive diagnostic tool, no extra ABS reset tool, scan tool etc are needed.


Monday 6 October 2014

Why Digiprog 3 Cause Blue Screen?

Following is the instruction to solve the Digiprog 3 Blue Screen Problem:

Step 1. Take down the fly cable between X1 and C30 in the red box.
(see following picture)
digiprog 3 blue screen
digiprog 3

Step 2: Take down the IC on X1, then replace with a new IC. ( the IC pits should be compatible with the red point on the picture)

Step 3: Solder the fly cable (that has been taken out in first step) back to its original position.

Thursday 25 September 2014

How to read pin code from engine ECU

This procedure Opel+ Fiat IMMO Tool Immobilizer V3.50 works with Opel Immo2 cars ONLY!
select engine ecu type from menu
Switch ignition ON, Start software, and select engine ecu type from menu.
Press "Connect Selected ECU" button, after 5 seconds the data of the ECU will be shown on screen.
Press "Read PIN", software will read data from the engine ecu and after few seconds two pin codes will be displayed on screen. One for petrol engine and one for diesel engine. Choose the correct pin code depending on engine type - diesel or petrol. If you have selected wrong ecu, "message lost error"will be issued, and the connection with ecu will be terminated. You can select other ecu, and can try again.
Warning: Selecting "Delco All Types" will read pin code but also will set trouble code 0602 in engine ecu, which can't be erased!!! Use this option only if you don't care about this trouble code!
IMMO tool read engie ECU
Connect immo2, and press"Special functions". New window will be open. Select desired operation and after that enter the correct pin code. The commands "Clear engine ecu" and "Clear immobiliser2" requires additional wait time, from 10 minutes to several hours in the worst case. The car have to be left with ignition switched ON during this wait time! During this wait time, you can turn off your laptop.
http://www.obdexpress.co.uk/wholesale/opel-fiat-immo-tool-immobilizer-v3-50.html

Tuesday 16 September 2014

VDM AUGOCOM H8 Multi-Brand Truck Diagnostic Tool

VDM AUGOCOM H8 + Software Diesel Truck Interface is newly released multi-brand truck diagnostic tool, AUGOCOM H8 Software is a PC-to-vehicle interface compatible with multiple software applications, minimizing your investment in multiple brand-specific diagnostic.
Augocom H8 truck diagnostic tool
Get a VDM AUGOCOM H8 reasons:

1. Compatible with applications that diagnose engines, transmissions, ABS, instrument panels and more.

2. Reduce reprogramming times with direct USB connection

3. Mixed fleet capabilities with broad protocol support

4. Quick access to vehicle data for maintenance or management reports

5. Quickly attaches to vehicle's diagnostic connector.

6. Easy portability increases flexibility, May be used with desktop PC or laptop.

Augocom H8 truck diagnostic tool
 VDM AUGOCOM H8 Truck diagnostic tool packed software and application
- Allison (Included!)
- Bendix 6.3.8.0 (Included!)
- Detroit Diesel DDDL 7.05 ((Included!)
- Detroit Diesel DDCT (Included!)
- Detroit Diesel Calibration Tool (Included!)
- Eaton Service Ranger 3.2 (Included!)
- International DLB (Included!)
- International ICAP, IPTS, NETS, IPC (Included!)
- International Master Diagnostic (Incluided!)
- Meritor and Wabco Diagnostics (Included!)
- Cummins Insite 7.5 (Included!)
- Caterpillar 2.0.1.0 (Included!)
- Perkins EST 2010B (Included!)
- V Macks 2.6.12 (Included!)
- V Macks Dealer Pro (Included!)
- Volvo VCADS 2.35.10 (Included!)
- Toyota Techstream for car (Included!)
http://www.vvdishop.com/

Wednesday 3 September 2014

How to solve DS708 fatal application error

While I updated the Autel Maxidas DS708 software, I met with this fatal application error:application autorun.exe has performed an ilegal operation and will be shut down. If the problem persists,contact the program vendor.

Autel Maxidas DS708 fatal application error

Solution:

Step 1: log in your account on Autel offical website download the update tool to your computer

Step 2: formating your cards

Step 3: download the software from Autel offical website and update it again.

More professional Autel tools, OBD2 Scanner

Friday 29 August 2014

SVDI VAG commander error solution

SVDI is the professional diagnostic tool for VAG Group, including VW, AUDI, SKODA and Seat. Besides, it adds BMW software. Basic function including diagnose, key programmer, mileage programmer and so on. It can program the key for the newest BMW F series via reading CAS4 data(For this  funtion,customers need to purchase BMW update modules for SVDI ). Generate the chip ID67,ID68,ID70,TP22,TP23,TP24 and so on. Via reading immobilizer unit data, generate the keys for Fiat, Toyota, Ford, BMW, Audi /VW Kessy, Mercedes, Jeep and more. Meet all your needs for VAG.

How to solve SVDI VAG commander diaplsy different Product Description and Serial Number?

After click SVDI Device: 0 Property, if you find the Product Description and Serial Number is not as the same as that pasted on SVDI Commander hardware, then follow the bellow instruction to fix it.

1) Diconnect all USB devices with PC. Then connect SVDI to PC to launch "FT_PROG.exe" software. Click "Search Icon (Magnifying style)" to acquire hard disk information ( just show as the following photo).
SVDI VAG commander error solution
(Attention: This solution only can be used to fix SVDI which has the different hardware as the description on the above red box, other problems, please contact your dealer)

2) Apply Template
Right click to select "Device0">>"Apply Template">>"svdi-temp.xml" file (as shown picture below)
svdi-vag-commander-technical-support-and-error-solution-des-blog-2
3) Program Template
Click "Program Devices (Lightning style)" to selct "Device0". Then click "Programe" button to start programming. Wait patiently until programming completed. Disconnect USB and reconnect to launch SVDI software.
SVDI VAG commander error solution
http://obd365.mee.nu

Monday 25 August 2014

2014 GNA600 Honda Diagnostic Tool with Newest Software

Honda GNA600 Honda diagnostic tool comes with the latest software to access immobilizer, reprogram key and install new or used PCM's functions. Full access to all systems using the only guaranteed accurate data available. This kit will also give you access to the latest reflash software for PCM updates. This software also includes a scan tool with OBD2 access to all other cars 1996 on.
Honda GNA600
Honda GNA600 Tool FAQ:
Q: How to update for the GNA600?
A: GNA600 can update by CD, you can send the serial number on the main unit to us, my technician will update the software for you.and then will send the new version CD to you. then it is ok that you can install the software on your computer.

GNA600 Honda Notes:
1. Be sure to disable/uninstall anti-virus software
Please note,anti-virus software can flag up Honda GNA600 software as having a virus. This is a false positive and is due to the software containing the application file. So Before setup the device software, please disable/uninstall anti-virus software or install a more reliable free virus scanner! Our Honda GNA600  software is completely safe and virus free and all other virus scanners confirm this.

If the Honda GNA600 software data is destroyed or lost because you forget to disable/uninstall anti-virus software, please contact our customer service, we arrange to resend you CD or send you the software via internet.

2. Required windows operation system is windows XP
Be sure to setup and run the device software under windows XP. Otherwise the device software and program can be broken or it will fail to work.

http://obd365.mee.nu

Thursday 3 July 2014

kess v2 wake up error solution


How to Solve KESS V2 Wake up error?


If you encounter "Wake up error" when running Kess v2 as the following picture shows:

Possible reasons for wake up error:
Kess v2 fails to read out TF card program or the program in the TF card is not working properly.
2 reasons for Kess v2 fails to read out TF card program.
1) The four pins of chip are not soldered firmly on the main board.
2) The chip is loose for a long time of use.

Try to do as following instruction:
1) Solder the chip once more to make it tightly connected to the main board.
2) Clean up the shrapnel on the card slot with a brush.
3) Lift up the shrapnel a little bit to make sure it can well communicate
with the TF card, if the card slot shrapnel is not flexible enough.
4) Clean the TF card and then put it back to the card slot.

If the wake up error stays, format the card and then copy the software back to the card.
It is easy 3 basic steps, pay attention to the important note.
1. Format TF card
2. Ask us to send you the software in the TF card
3.
decompress the file, choose them all, copy and paste to TF card.
(IMPORTANT NOTE: Don’t directly copy the compressed file to TF card;
don’t create a new folder in TF card and copy decompressed file into
it.)

(1. Decompress file: kessv2 up)

(2. Copy the 4 files and paste to TF card)
Note: Following is Wrong operation:

If
the two methods above do not work out wake up error, reflash the CPU
program, and then copy and paste the software to the TF card again. The
procedure to reflash CPU is as the same as that to solve token
limitation as the following link shows:

Wednesday 2 July 2014

How to Use Engine Diagnostic Machines

In 1996, by order of the Environmental Protection Carprog Agency, engine diagnostics became standardized for vehicles sold in the United States. As a result, diagnostic coding is the same in a Ford as it is in a Chevrolet or a Chrysler. The process of accessing a vehicle's second generation on-board diagnostic system is the same, as well. A handheld computer is needed. The functionality this type of device covers a broad spectrum. Cheaper, simpler diagnostic machines are simple OBD-II code readers, while the more sophisticated scanner can do much more.
1. Insert your diagnostic machine into the your vehicle's data link connector. For most vehicles, this 16 pin-receiving outlet can be found in the leg space on the driver's side of the vehicle. It will either be under the steering column or to the left or right of the steering column.
2. Switch the diagnostic machine on. Some of the higher end scanners have a self-activating feature, whereas some of the more simpler code readers may need to have the power button pushed.
3. Turn your vehicle's electrical system on. Doing this depends on the brand and type of OBD-II scanner. Some will need to have the engine running.
4. Issue a retrieval command. How to do this also depends on the specific device you own. Button locations do vary and some scanners use a manu system. Also, some scanners are preset to automatically pull codes from a vehicle's computer, once a data stream is sensed. For the exact instructions on how to do this, consult the manual of the device you own.
5. Look at the codes on the device's screen. Often, they will be differentiated by their status in the vehicle's computer. Some codes will be labeled as "faults" or "trouble." This means the codes have happened quite frequently, and the system has activated you vehicles service engine soon light. Other codes will be labeled as "pending." These are still recorded malfunction, but they have occurred a little less frequently than fault or trouble codes. Pending codes do not active a vehicle's service engine soon light.
6. Look at the first character in the OBD scanner on the screen. This letter will tell you where to look for the problems. "P" stands for "powertrain," and the codes correspond with problems in the engine. "C" stands for "Chassis" and the codes correspond with issues in the electrical system. "B" stands for "Body" and correspond with mechanical issues not associated with the engine. "U" stands for network communication
7. Look on your device for something akin to "live data." Simpler code readers may not have this function. You can shift out of code reading mode and obtain readings from your vehicle's many sensors. This way, you can find outoil pressure and engine revolutions per minute. If your scanner has this feature, it quickens the troubleshooting process. Many of the OBD-II codes correspond with specific engine sensors. If you have only a simpler code reader, you will have to check these sensors independently, usually with a continuity tester and a volt meter. Maxidas ds708

Friday 27 June 2014

Restart a Car That Has Run Out of Gas

If you're the type to let your car perennially run on or near empty, you will likely run completely out of gas at some point. In many cases, the long walk to the gas station is the hardest part of this embarrassing situation, but sometimes you could also have a difficult time restarting the car even after you put more gas in the tank.obd2 scanner

1. Replenish the tank with a minimum of two gallons of gas to get you to the next gas station. Place the gas cap back on before you attempt to restart the car.

2. Pump the gas pedal a few times to help get the new gas moving through the system.

3. Turn the key to the "on" position to prime the fuel injectors if your vehicle has a fuel injection system (skip this step if it does not). Wait a few minutes.

4. Turn the key all the way to restart the car. You may have to hold the key in place for a few seconds before the car turns over.

5. Wait a few minutes and then repeat the process if the car does not restart after the first attempt. If after five attempts the car does not restart, allow the car to sit for at least an hour before trying again.

6. Tow the car to a trusted repair shop if after an hour it still does not restart.

Monday 23 June 2014

How to diagnostic Airbag Codes for a BMW X5

For automakers, safety is a priority, and according to the Insurance Institute for Highway Safety, airbags significantly increase automobile safety. Every new car, including the BMW X5, comes with airbags. If your airbag warning light comes on, or you think there is something wrong, you can check them by plugging in an airbag scanner tool. The tool will give you a numeric code that corresponds to a specific airbag or seatbelt malfunction in your car.

Fault Code 2
Both airbags and seatbelts are considered part of your BMW X5's Supplemental Restraint System, so some of the codes your scanner tool prints out may deal exclusively with seatbelt problems. Others, like fault code 2, relate to the airbags. If the scanner gives you fault code 2, it means that the driver's side airbag ignition circuit is defective. This code will sometimes be tripped when other parts, such as the steering wheel, are repaired, so a qualified person will need to check the circuit wires to verify the problem.

Fault Code 5
If this code comes up, it means that the airbag ignition circuit on the passenger side is defective. As with fault code 2, your BMW X5's circuit connections and wires will need to be checked. This should always be done by a professional or an experienced person to avoid injuries or damage to the vehicle.

Fault Code 19
Sometimes your warning light will not go off, or it fails to come on when you are sure there is a problem. If you check your SRS system and see fault code 19, it means that you may have a faulty warning lamp. Check your light by turning your BMW X5 key to ignition-lock position 1. If the lamp lights and goes out after a few seconds, it is not faulty. If the lamp stays lit, you may need to code your airbag control unit.

Fault Code 73
Getting this fault code when scanning your BMW X5 means that your airbag squib wires may have short-circuited. The circuit wires to specific numbered pins -- 1, 2, 3, 4, 10, 11, 13 and 14 -- should be checked for short circuits among themselves. As always, mechanical work involving electrical circuits should be done only by an experienced person or qualified professional.

OBD2 scanner
http://www.obdexpress.co.uk/

Wednesday 18 June 2014

Ways to Increase Fuel Mileage on a 4.3L Vortec

The Chevrolet 4.3 V-6 engine used in a number of trucks and vans throughout the 1980s and 1990s. Among the larger V-6 engines produced, the fuel economy often suffered in exchange for impressive torque and horsepower. Making these engines more efficient is simply a matter of adding a few bolt-on accessories, though it is unrealistic to expect the fuel economy of four-cylinder engines or hybrids.

Air Intake Upgrade digimaster 3

The first and most obvious way to improve the fuel economy of your 4.3 V-6 engine is by improving the quality of the air that the engine consumes. This can be done by adding one of two products, both widely available at any local auto parts store. The first is a simple high-flow air filter, which installs in place of the stock paper filter; the second is the replacement of the entire intake track with a cold-air induction kit. Both improve fuel economy, though the cold-air induction kit does so significantly more than the basic high-flow air filter, as is reflected in the price disparity between the two parts. Expect to pay upward of $300 for a cold air induction kit, and less than $50 for a high-flow air filter (as of 2011).

Exhaust Upgrade

The installation of a catalytic converter-back exhaust system works best when installed in tandem with a cold air induction kit. By limiting the restriction of air within the engine, the engine is made more efficient. As a by-product, you will also notice a significant improvement in the throttle response and power of the truck or van. Under normal driving conditions, the additional 20 or so horsepower gained with the modification will translate into at least 1 to 2 additional mpg in fuel economy.

Throttle Body Spacers Creator C110

Throttle body spacers, when used by themselves, have a negligible effect on the power and fuel economy of the 4.3L engine. However, when used in conjunction with modifications, can significantly improve fuel economy. They do this by increasing the volume of air taken into the intake manifold, as well as spinning the air to help further atomize the fuel-air mixture. The throttle body spacer by itself may only add 1/4 to 1/2 mpg in fuel economy, but used with the exhaust and air intake upgrade, can improve fuel economy by as much as 1 to 2 mpg, in addition to gains realized by the intake and exhaust upgrade.

Computer Programmers

Engine management computers are designed to work with a broad range of variables. Taken into account is the lowest possible octane rating of fuel available nationwide, which is generally 87 octane, as well as a broad spectrum of air densities to account for the different elevations in which the vehicle is likely to be operated. Using a computer programmer allows you to fine-tune the engine of the vehicle to the exact specifications of the area in which the truck or van is usually driven, as well as your preferred octane fuel. Using a computer programmer can increase fuel efficiency by 2 to 4 mpg, depending on driving conditions and your driving habits.
http://www.obdexpress.co.uk

Tuesday 17 June 2014

How to diagnose the BMW Head Gasket?

bmw head gasket problem obd365
Despite the fact that BMWs Creator C110 are among the best engineered cars in the world and the company is a leader in many aspects of the automotive industry, many of the cars it produces can suffer from head gasket problems. This is caused by a few factors, namely the fact that BMWs often appear to have water pumps, thermostats and radiators that don't last long. There are some things that can be done to prevent a warped head gasket as well as signs to look for if you think you have a problem with the head gasket.

Causes
A failed head gasket is generally cause by an overheating engine that, in turn, causes the head to warp. If the head warps, the head gasket cannot properly seal the head to the block, allowing coolant to mix with the oil inside the motor. An engine will overheat for a variety of reasons. If the water pump fails on a BMW, it will stop circulating coolant from the radiator into the motor, causing potential overheating if the problem is not caught in time. If the thermostat fails, then the fan will not turn on and cause overheating. The least likely possibility is a failed radiator core, though this does happen as well.

Identification obd2 scanner
There are several signs that a BMW has a blown head gasket, such as if the temperature gauge shows the car is routinely running hot. If the low coolant light comes on, even after topping up the coolant, it's leaking somewhere. Another way to tell is by opening up the engine's oil cap and inspecting the oil. If the head gasket is blown, the oil will mix with the coolant and the oil will have a brown, milky appearance. If white smoke comes out of the tailpipe even after the car is warmed, there is a good chance there is a problem.

Prevention/Solution
There are several things you can to help ensure your BMW motor does not suffer from a blown head gasket. It is recommended you change the water pump every 60,000 miles or so and replace the thermostat if there is any sign of the motor running hot. Though radiators are expensive, it's a good idea to replace them every 100,000 miles or so. It is also possible to upgrade to an aluminum radiator on most cars as well as a better engineered aftermarket water pump. It's also a good idea to periodically have the coolant flushed and replaced.

What Happens if the Head Gasket Is bad?
If the head gasket blows on a BMW, fixing it is labor intensive. The head gasket itself is usually a $200 part, but removing the head takes many hours. Most shops charge around $1500 to properly fix a head gasket.

http://www.vvdishop.com/

Friday 30 May 2014

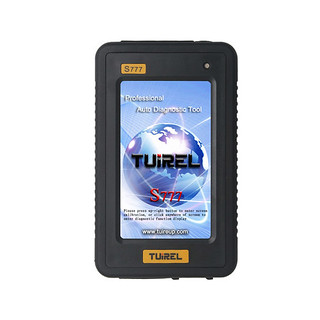
Function and My test of Tuirel S777

Three weeks ago, I bought Tuirel S777 from OBDexpress.co.uk. And I got my package last week, it packed well. I used it to test many cars and now I want to share my experience with you.

Tuirel S777 can diagnose Audi, Benz, Nissan and so on. Even the old vehicles before 1996 can be also diagnosed by connecting the OBD1 to OBD2 connector (non-16pin cable to 16pin cable). I tried to test 2014year car models, so I downloaded the car software from the office website: http://www.tuireup.com/. I found that it can program keys for Nissan but it can't work for diesel vehicles. For the 12V car and 12V pickup truck, it's OK. I can update on official website, and it's available with much world-wide languages, so it is another tool for world-wide users.


Video: Test Car on Tuirel S777 Retail diagnostic tool


Friday 23 May 2014

How to Troubleshoot a Car Stereo That Will Not Power

The most likely cause of a stereo MIRACLE-A7 not powering up is a blown fuse. Other causes can be a short in the wiring or other wiring problems. Cars are unforgiving environments for electronics, and vibration, heat and dust can all cause premature failure. Vibration can cause wiring to become loose. Tight working-space confines can create difficulty making connections in the first place.

Turn the ignition key to the accessory setting and press the "Power" button a few times to verify the condition.

Check that the stereo circuit fuse hasn't blown. The fuse is in the centralized fuse block location with all the other fuses. There are usually spare fuses in the box, so you can replace the fuse with the same rated fuse. The size and color should match the existing fuse.

Remove the car stereo from its internationally standardized slot in the car's dashboard known as a DIN -- Deutsches Institut für Normung -- slot. You will likely need a set of car stereo removal tools to slip into the notches on each side of the panel and release the head from the mounting bracket. Take a look at the back of the head and you should see some groups of wires connected to wiring harnesses. The wiring harness can be split into two or three areas—speakers, power and accessories, such as subwoofers. Take a close look and make sure no wires are loose entering the harness. Make sure the harnesses are plugged into the car stereo.

Trace back wiring Honda GNA600 from the car stereo's control head power harness to the fuse block and verify that the wiring is all intact. If you encounter a fuse along the red wire, replace it. The black wire may well go straight to the car body—it's the ground. Check that the connection is good and not rusted out. Remove the wire and use sandpaper to clean the connection. Replace the wire.

Monday 19 May 2014

How to Reprogram a BMW Key Fob

The instructions creator c110 BMW code reader to program the keyless entry fob on one BMW model won't necessarily work on another BMW model. You can try one of two sets of instructions and see if they work for your BMW. Your aim is to avoid resorting to the dealership, which may charge $50 to $100 for the service.

Make sure that all the doors, trunk and hood are closed.
Open the trunk door. Open and close the driver's door.
Put the key in the ignition cylinder and turn it on and off five times. Don't actually start the engine. The alarm should chirp a confirmation.
Open and close the driver's door.
Press any button on the remote to program it. The alarm light will flash to acknowledge a successful programming.
Repeat steps 4 and 5 for any other remotes.
Exit the programming mode by leaving the driver's door open while closing the trunk door. Then close the driver's door. You should hear the alarm sound off to confirm that you’ve left the programming mode.

Instruction Set Two V54 Fgtech
Make sure that all the doors, trunk and hood are closed.
Insert the key into the ignition and switch it to position 1. Turn it back again. Repeat this four more times. Then remove the key from the ignition cylinder.
Press the "Lock" button three times while holding down the "Unlock" button. Then release the "Unlock" button. The door locks will then cycle to confirm that you did it correctly.
Repeat step 3 for each fob that you need to program.
Exit the programming mode by inserting the key into the ignition and turning it to position 1 and then taking it out.

Wednesday 30 April 2014

iOBD2 Diagnostic Tool for iPhone with WIFI

iOBD2 is a vehicle diagnostic tool for iPhone, and it communicates with these smart phones by WIFI. It supports OBDII/EOBDII. It records the data by the client software of the phone. It records data like engine speed, ignition time, fuel correction, fuel consumption, coolant temperature, when you are driving the car and it shows these data by form or graph format.


iOBD2 Diagnostic Functions

Support vehicles with OBD II/EOBD protocol.
Read DTC
Clear DTC
Read data stream
Read freeze frame data, vehicle information
Oxygen testing
Mode 6 testing
Evaporative Emission System Leak Detection

My Dashboard

Idle speed mode: control the voltage, intake air flow, real time fuel consumption (static), coolant temperature, spark advance angle, engine speed
Cruise mode: vehicle travel time, average speed, continuous running mileage, average fuel consumption, vehicle speed
Sport mode: vehicle speed, coolant temperature, real time fuel consumption (dynamic), acceleration, engine speed. It is with rich user experience.

Thursday 24 April 2014

Troubleshoot Vehicle Overheating Engine

Overheating engine is commonly seen in automotives. What is the reason? How to troubleshoot?

Obd365.com informs you to inspect 5 vehicle parts to troubleshoot overheating engine.

1. Inspect Engine Coolant Level, Test for Leaks and Test Radiator Cap
Why should inspect on engine coolant level, test for leaks and test radiator? The reason is that coolant functions on transferring heat from the engine to the radiator, if lack of coolant or leakage of coolant, the procedure will malfunction, leading to overheating on engine. Overheating problem may affect the performance of radiator and coolant reservoir. Milky oil condensation in the engine will lead to failed cylinder head after you have cap removed to examine.

Tip: make sure proper engine coolant level and no leakage. If necessary, repairs or refill system should be done.

2. Inspect Engine Thermostat
Thermostat is used to regulate the flow of coolant from the engine to the radiator. If car thermostat malfunction, coolant flow stick closed will be stopped and overheat.

Tip: replacement is needed when the water has boiled and the thermostat valve is still closed the thermostat has failed.

3. Check Engine Cooling Fan Clutch or Electric Fan Operation
The cooling fan system works to move air through the radiator, so it fails to work, it will lead to engine overheat.

Tip: be noted to turn ignition off before start check it

4. Low Flow through Radiator
Radiator in a car is designed to remove heat from the engine coolant through convection.

Tip: replacement is necessary if he radiator cooler tubes are plugged drain the cooling system completely.

5. Plugged Catalytic Converter
Catalytic converter is one of the main emission control device in a car, high temperature in it wil crack and come apart clogging the outlet port of the converter causing, engine overheating, low power and stalling.

Tip: if a car is equipped with more throttles, it will create more heat for cooling system; if it exceeds to its capacity, overheating engine exists, and even accompanying with low engine power.

What is the reason of overheating engine?
Various reason lead to overheating engine, but all the reasons mainly because of cooling system failing to remove heat away, lack or low level of coolant and overload or create too much heat to engine.

Therefore, troubleshooting overheating engine should be careful of coolant, and the limited capacity to a car engine.

INstalling for MB STAR Compact C4 Update to 2013.09

Thursday 10 April 2014

Diagnose GM Ignition Control Module Problem

The most important Tuirel S777 part of a vehicle's ignition system, including a GM vehicle, is the ignition control module because it regulates all aspects of the ignition, including the spark plugs. Mechanics use a special diagnostic scope to identify any existing problems within the ignition system, but if you do not have a scope, there are ways to visibly troubleshoot components of a GM vehicle's ignition system.

No Lubrication

Grease or silicone should always be present on modules that are in good working condition to prevent the penetration of heat through the module's surface. Inspect the module for a visible layer of grease or silicone on the back of it. If this film is absent, the module needs to be replaced.

Irregular Spark NEXIQ 125032

Install a timing light and monitor the engine for an irregular spark while the light is operating. If you notice an abnormal spark, but the spark plugs do not look damaged, the ignition module may be faulty.

Cracks

Any cracks or damage to the module's surface indicate a problem. Remove the module and inspect it for damage or cracks on the surface or around the mounting screws. If there is any visible damage, replace the module.


http://blog.obd365.com/2014/01/13/how-to-solve-x431-idiag-can-not-buy-single-car-software/


Friday 28 March 2014

Tips on how to Use a Fault Code Reader


A fault obd2 scanner assists you in repairing your automobile by telling you what the vehicle's self-diagnostic procedure "thinks" is incorrect. Given that 1996, Federal law necessitates that all cars offered within the United states of america be on-board diagnostic (OBD) compliant. The normal in 2011 is OBD2 and it is an improvement within the unique process. Whenever a fault code enters the vehicle's pc it triggers the test engine light. By understanding that code, you are able to promptly narrow down the problem and make your fix.
Turn the vehicle's ignition on the off place.
Locate the vehicle's 16-pin information hyperlink connector. This looks similar to a laptop serial port and it is ordinarily positioned beneath the dashboard below the steering wheel or within the left, bottom corner.
Push VDM UCANDAS the code reader's cable connector in to the vehicle's information link connector. Be cautious to adequately align the connections in order to avoid damaging the pins.
Look in the OBD2 code reader to determine if it automatically turned on if you plugged it in to the car. If it didn't you might possess a difficulty using a blown fuse. Verify your fuse panel and replace any blown fuses.
Turn the vehicle's ignition on the on place but don't begin the automobile. The fault code reader will immediately verify the vehicle's computer for fault codes.
Wait ten to 60 seconds for your fault code reader to download the codes. The codes is going to be displayed on the screen with an explanation of your dilemma. If there may be greater than a single code on the vehicle's computer, you'll be able to cycle as a result of them by pressing the button with an arrow pointing for the proper.
Record the fault codes CK-100 on the note pad for reference when operating on the motor vehicle.

Monday 24 March 2014

The best way to Recharge a Dead Motor vehicle Battery

In a appropriately obd2 diagnostic functioning car, the battery gives temporary energy to start out the engine and run add-ons just like the lights and radio when the engine is switched off. The alternator, on the flip side, supplies electrical power to energy all of the car's functions while the engine is working as well as recharges the battery. Should the alternator fails the battery will die, since it is not receiving recharged. The only long lasting resolution to this trouble should be to obtain a new alternator but you'll be able to recharge the battery within the indicate time.
Jump start your vehicle. If your battery is dead, you could deliver a temporary charge on the battery applying jumper cables. Connect the cables to a operating automobile after which to your battery. Leave the cables attached for a number of minutes and have the driver of your functioning automobile press down on the accelerator while their vehicle is in park. This can give a surge of electricity to your battery. Get started your car and disconnect the cables.
Connect Creator C110 your battery to a moveable motor vehicle battery charger. Ensure the charger is entirely charged then attach the red clip towards the optimistic terminal of your battery as well as black clip to the negative terminal. The amount of time it'll take for the battery to fully recharge will differ based on the power of one's charger. A 10 amp charger will generally take 45 minutes to recharge. Check with your charger's manual for certain recharge occasions.
Connect your battery to a wall charger. Should you do not have a portable charger you'll be able to connect it to a charger that plugs into an outlet. You could use an extension chord if it isn't raining to charge your battery when it is nevertheless in the motor vehicle or take out the battery. Pull the battery out and get it to exactly where your charger is. Ensure it is actually sitting on the degree surface though it charges. Connect the black clamp for the adverse terminal and also the red clamp on the beneficial terminal. The LED light within the charger will turn green when the battery is absolutely charged.
Make your CK-100 very own trickle charger. When you don't have a wall charger you can produce a trickle charger working with a 12V appliance or cellular phone charging chord. Simply cut off the connector within the end then seperate the 2 wires that make up the cable and pull them apart. Strip the ends with the wires. Use a multimeter to find out which wire has the damaging charge. Attach a black alligator clip to it. Attach a red alligator clip on the other wire. Clamp the clips onto the battery and plug it it. A 12V charger will consider about twelve hours to recharge a dead battery.

Wednesday 19 March 2014

How to Inform If a Starter Relay Is Undesirable within a Ford


A obd2 scanner terrible starter relay on your Ford motor vehicle will reduce the necessary electrical energy from reaching the starter motor; fail to minimize off power; or hold the motor from starting in any way. Fortunately, all Ford versions possess a remote relay close to the battery, which makes it simple and hassle-free for troubleshooting. This manual will help you establish whether the starter relay in your Ford has gone terrible, working with a jumper wire and a multimeter.
Disable the ignition method. In case your Ford comes outfitted using a distributor, unplug the ignition coil from the distributor, and ground it on the engine using a jumper wire. In case your vehicle is not outfitted with a distributor, you can get rid of the fuel pump relay or fuse for these exams.

Have a helper flip the ignition essential to "Start." You need to hear a clear click coming from your relay. If not, make sure there's a superior connection at the management circuit wire around the relay; this is often the tiny wire within the terminal marked with an "S." In the event you hear a weak or chattering click, proceed to Phase three. In the event you hear a fantastic click, skip to Step four.
Connect Kess V2 a jumper wire from the favourable battery terminal towards the "S" terminal on the relay. Request your assistant to turn the ignition important to "Start." If you can now hear a good click, the relay is doing work properly. If there is a weak or chattering click, or no sound at all, be sure all the connections to the relay are clean and tight. The relay mounting bracket should make great get in touch with together with the automobile body. If all the connections are clean and tight, but the starter relay still does not function, then change the relay.

Check the voltage drop on just about every cable connection on the starter relay. Touch the probes of a multimeter on both sides of your same connection in the relay. The favourable probe on your meter need to always be within the side with the connection main for the positive side of your electrical existing. Inquire your helper to yet again flip the ignition essential to "Start." The multimeter really should register no more than 0.two units of voltage drop on every connection, according to Ken Freund in "The Haynes Automotive Electrical Manual." Otherwise, make sure the connections are clean and tight. In case you still go through a higher voltage drop, replace the relay.

Unplug the wire at the "S" terminal to the relay. Verify the resistance amongst the terminal as well as the relay mounting bracket working with the multimeter. If there is over five ohms amongst these two points, clean the mounting bracket. In case you nonetheless study a higher resistance, exchange the relay.

Check the key pro m8 for incoming voltage with the relay "S" terminal. Connect the red probe of one's multimeter for the relay terminal as well as black probe to a fantastic ground including a metal bracket or bolt connected to your engine block or cylinder head. Request your helper to turn the ignition critical to "Start." Your meter should register voltage in the course of the test; otherwise, be sure the "S" connection and wire are clean and well-connected. If your voltmeter even now registers no voltage, change the relay.

Super Scanner ET801 BMW Code Scanner:https://www.youtube.com/watch?v=878dvjZmJOA

Monday 17 March 2014

The way to Prevent a Safety Technique From Beeping


Security techniques Kess V2 are meant to alert you and your family of possible dangers. On account of this vital perform, most alarm programs notify you if there is certainly difficulty during the process. There are many leads to for method difficulties; reduced batteries and open security zones (doors and windows) are frequent. In the event the procedure is encountering difficulty, you will normally recognize a beeping sound coming from the system or its elements.
Check your alarm panel, fire alarms and various sounding gadgets connected to your system very carefully to discern the place the beeping is coming from. If the beeping is not coming out of your process or 1 of its components, the problems lies someplace apart from the protection system.
Press the "Silence" button around the alarm panel. While alarm panels vary in make and variety, many have a "Silence" button to halt the beeping.
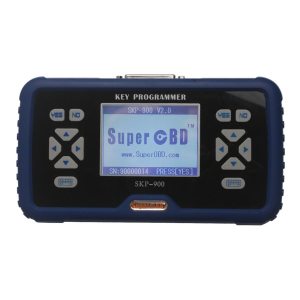
Enter your security code SKP900. Typically, your security code is actually a four-digit amount. Coming into your code frequently silences alarms if pressing "Silence" fails or if your system does not have a "Silence" button.
Superobd SKP900
Close all security zones--windows and doors--and arm and disarm your technique. If your beeping continues, try out arming and disarming the method again to clear out any difficulties signals. Typically, an alarm program will continue to beep following an alarm has just sounded; a lot of programs beep to notify you which zone was triggered.
Locate the security system's energy supply (normally a black case inside a closet or crawl area) and remove the wire-leads from your backup battery. Insert a fresh backup battery and replace the prospects. Systems generally use a 6- to 12-volt battery.
Unplug the safety method from your wall and take away the wire-leads from your backup battery; this can completely electrical power down your process. Do this only in case your security provider advises that it is Okay.
Check the wiring Porsche Piwis Tester II of your protection system with a voltometer. Search for faults during the wiring; several of the wires may well have become corroded. Only proceed if you have practical experience dealing with electrical elements; make contact with an electrician or your alarm service provider for support.

Wednesday 12 March 2014

What Makes a vehicle Hesitate When Accelerating?


Vehicle Creator C110 hesitation is generally caused by a disruption of fuel movement right into a vehicle's engine. Adequate fuel flow right into a vehicle's engine is critical for optimum motor vehicle functionality. Any mechanical problem or defect that disrupts typical fuel flow into an engine is likely to lead to a range of engine symptoms, which include engine hesitation. What follows is often a listing of the most common triggers of engine hesitation for the duration of acceleration.

Bad Spark Plugs
Spark plugs are responsible for igniting a vehicle's air/fuel mixture, a process that generates engine power. Undesirable spark plugs can negatively effect ignition of a vehicle's air/fuel mixture, which could cause engine hesitation, missing and knocking, either for the duration of acceleration or underneath consistent velocity.
Bad Spark Plug Wires
Bad spark plug wires can negatively impact the movement of present (electrical power) for the engine's spark plugs, which might result in incomplete spark plug firing and engine combustion, which might the two lead to engine hesitation for the duration of acceleration.
Dirty Fuel Injectors VAS 5054A
Dirty fuel injectors impede the flow of fuel into a vehicle's engine cylinders, and this may lead to restricted and/or incomplete engine combustion, which can bring about each engine hesitation plus the engine missing during acceleration or at cruising speeds.
Bad Carburetor
On motor vehicles outfitted with carburetors, engine hesitation is usually right due to a poor or abnormally working carburetor. A carburetor is responsible for injecting each air and gas into a vehicle's engine cylinders, and if a carburetor restricts the flow of either a single, engine hesitation can come about, either all through acceleration or at cruising speeds.
Dirty Fuel Filter
Fuel kess v2 getting into a vehicle's engine has to 1st pass through the fuel filter. A dirty, obstructed fuel filter can restrict fuel flow into a vehicle's engine, a ailment that may induce engine hesitation for the duration of acceleration.

Monday 10 March 2014

Ways to Diagnose Motor vehicle Difficulties if Know Absolutely nothing About Cars


Mechanical challenges obd2 diagnostic are abundant in automobiles. It truly is most helpful to possess an car mechanic within the loved ones to cut down over the cost of automobile fix. But like several men and women, that may be not a luxury a lot of folks share. Diagnosing car complications may perhaps appear from one's attain and comprehension, but it might be done which has a minor know-how.
Consult the vehicle's guide. Several complications during the modern day car or truck are detected through the auto itself. A light will appear or possibly a buzzer will go off alerting you that there is a problem. When this takes place, pay out consideration and check out the owner's manual right away. Replacement manuals are offered at auto part merchants and area super centers.
Call a tow truck. Benefit from automobile clubs that shell out for tow trucks. Pick the tow truck operator's brain when he is sent out. Tell him about the issue you noticed, what the motor vehicle appears to become executing incorrect and what lights or bells came on, and get his viewpoint and referral to an honest mechanic.
Go to on-line sites such as Automobile Boardz for guidance. Pay attention for the sounds the motor vehicle is building. Ascertain the place the sound is coming from and when it is actually coming. Then visit on-line support sites which include other eHow articles and outside sources. Choose the make, model, and 12 months of your car. Appear for solutions to very similar problems. Post inquiries on these online forums and watch for others to reply with their strategies and comments.
Consult The Key Pro M8 a mechanic in instruction. Quite a few nearby neighborhood schools and vocational substantial schools have car mechanic courses. Get in touch with the instructor and request if they have any ideas or would like to use your car's dilemma as being a task to repair. This can be a actual win-win predicament - you receive less expensive or no cost function accomplished and also the college students possess a real-life situation to find out in.

Monday 3 March 2014

Ways to Alter Fluid in an E40D Transmission


The Ford E4OD obd2 diagnostic, which stands for electronic four-speed overdrive, was Ford's 1st ever electronically managed transmission. Its predecessor, the C6 transmission, utilised only hydraulic pressure and mechanical linkages to operate. The E4OD uses many electronic sensors through the entire motor vehicle, as well as hydroelectrical solenoids to shift gears. This transmission noticed use in Ford full-size truck and vans, as well as SUVs through the 1990s. Part of keeping the E4OD transmission is usually to alter the fluid periodically. Ford states the fluid need to be modified every single 60,000 miles.
Raise the front with the car with a floor jack and location the jack stands under the frame rails. Reduce the automobile until eventually its fat is only on the jack stands.
Slide the drain pan under the automobile until finally it is actually right under the transmission pan, the metal pan on the bottom of the transmission.
Crawl beneath the car, loosen and remove all but four in the bolts -- depart 1 at every single corner -- from the transmission pan, applying a ratchet and socket. Loosen, but usually do not eliminate, the 4 remaining bolts, working with a ratchet and socket.
Pull down over the transmission pan to free of charge it from your base on the transmission. Fluid will begin to drain from your pan.
Remove the remaining 4 bolts through the pan, utilizing a ratchet and socket, once the fluid has stopped draining. Ensure to hold the pan as you take out these bolts, as there is certainly still fluid while in the pan and it could fall, triggering a large oil spill. Tilt the pan to a single side when all 4 bolts are removed to drain the remainder of your fluid through the pan.
Scrape the pan gasket in the top of the pan, working with the razor blade scraper, and use the abrasive pad to clean the major with the pan.
Spray the within from the transmission pan with the car components cleaner and wipe it down with store rags. Make certain to clean out all of the old fluid and debris through the pan.
Place the key pro m8 a thin bead of RTV silicone throughout the top rated a part of the pan, in which the gasket sits, and place the gasket to the pan. Ensure to line up the holes from the gasket with individuals in the pan. The RTV silicone will hold the gasket in spot when you reinstall the pan.
Place the pan back over the transmission and hand-tighten the twenty bolts. Tighten the bolts to 12 to 16 foot-pounds, inside a crisscross pattern, working with a torque wrench and socket.
Raise the motor vehicle off in the jack stands by using a floor jack and take out the jack stands. Reduce the car to the ground.
Open the Ford's hood and take away the transmission dipstick through the filler tube positioned at the rear, passenger's side of your engine. Location a funnel inside the filler tube and add about six 1/2 quarts of Mercon transmission fluid.
Reinsert the dipstick and start the vehicle. Permit it to reach operating temperature, roughly halfway up the temperature gauge around the instrument panel, and shift by just about every gear even though holding the brake pedal.
Place digiprog 3 the transmission indicator in "Park" and check out the transmission fluid degree on the dipstick. It has to be within the crosshatched location on the dipstick. When the fluid is low, include Mercon fluid till it reaches the crosshatched location.
Close the vehicle's hood and shut the engine down.
Pour the fluid through the drain pan in to the empty Mercon transmission fluid bottles, utilizing a funnel like a guide. Get this previous fluid to a nearby car components shop for proper disposal.


Friday 28 February 2014

My Headlights Won't Operate


Both headlights on your car obd2 diagnostic are out and won't come on -- it truly is time to troubleshoot! If each headlights are out concurrently, the situation is most likely to get electrical. To troubleshoot, start out with the easiest point to fix and do the job from there. Whether or not you control to obtain the lights working once more, verify other probable difficulties to avoid a recurrence.
Inspect the headlights to make certain the filaments are certainly not broken. Clear away just about every headlight from its housing and check out to determine if your filaments are intact. If not, exchange the broken bulb. Do not touch any a part of a Halogen substitute with your fingers except the base. Oil out of your fingers within the glass bulb can cause the headlight to fail prematurely. If both lights are out, replace them both. Test to find out if the new headlines are doing work.
Check the Kess V2 headlight fuses during the car's fuse box. Open the fuse box and test the headlight fuse. If your fuse exhibits as burned out, replace it and test the headlights again.
Check the connectors, wiring harness and socket into which the headlight bulbs are plugged. Seem for rust or corrosion around the connectors and wire harnesses. Also, look for wires which have pulled loose. Replace the connector harnesses, wiring or sockets if there is any indicator of damage, put on, looseness or corrosion. Be sure the ground wire in the light socket housing to your vehicle frame is creating an excellent connection.
Pull out the headlight relay in the event the headlights still usually do not perform. Shake it. In the event the relay rattles, it desires for being replaced. Should the procedure employs a management module as an alternative to a headlight relay, you'll need to consult your vehicle repair manual to recognize the module. Test to be sure energy is reaching the module. If it is as well as the headlights nonetheless will not do the job, change the manage module. The lights need to come on.
Replace the NEXIQ 125032 headlight switch if there may be no energy reaching the headlight relay or control module. The headlight switch is almost certainly broken and demands for being replaced. Get aid with this a single out of your dealer, primarily when the switch is during the steering column. You might set off the airbag and injure on your own or injury the vehicle.
INstalling for TECDOC TEC DOC EPC SPARE Parts: http://youtu.be/vQlHKj9YVVE